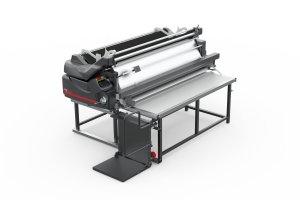
A fabric spreading machine is operated in four steps: preparation (relaxed fabric, a spreading plan, a clean table, a visual machine check), roll loading (lift the roll into the cradle, face in the right direction, thread the fabric through the dancer bar and the edge sensor), settings (speed, tension, edge alignment, lay length and ply count by fabric type, recalled from memory) and spreading (automatic spreading in the chosen mode while the operator watches splices, defect flags and edge drift). A 5-minute clean-up at the end of each shift and a weekly sensor and rail check prevent most breakdowns. The safety rule is simple: never reach onto the table or near the end cutter while the machine is moving, and never bypass the safety sensors.
This guide gives cutting rooms that are commissioning an automatic spreader or training a new operator the step-by-step procedure, a parameter table, a maintenance schedule and 8 safety rules.
- 8 Checks Before Spreading
- Roll Loading: Lift, Cradle and Fabric Path
- Settings: Speed, Tension, Edge, Length and Plies
- Spreading Modes: Face-Up, Zigzag, Stepped, Tubular
- What the Operator Watches During Spreading
- Daily, Weekly and Monthly Maintenance
- 8 Safety Rules
- 7 Common Operator Mistakes
- Frequently Asked Questions
The automatic spreader is the machine in the cutting room that raises the most “how do I use it” questions, because cutting quality is decided during spreading. When a ply edge drifts 5 mm, when fabric is laid under tension or when a splice lands inside a pattern piece, even the best cutter cannot produce pieces to size. The good news: on a modern machine the heavy work is automatic. The operator’s job is correct preparation, correct settings and attentive monitoring. This article walks through the whole procedure using a fully automatic spreader of the MN1 class as the example; if you have not chosen a machine yet, start with how to choose a fabric spreading machine.
1. 8 Checks Before Spreading
Most spreading errors are made before the machine starts. Run through these eight items at the start of every shift and every new job order:
2. Roll Loading: Lift, Cradle and Fabric Path
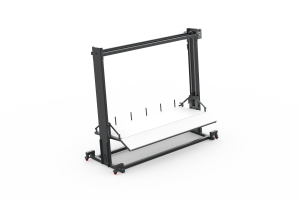
A fabric roll starts at 40 kg and reaches 350 kg in denim. Lifting by hand risks injury and knocking the roll against the table, which crushes the fabric. Loading is therefore always done with a lift (roll loading hoist) or the machine’s own tilting cradle. Inside the machine the fabric follows this path:
A wheeled hoist such as the ML1 Master Lift carries rolls up to 350 kg and 160–220 cm wide; centre the roll in the cradle. On a machine with a tilting cradle, lower the cradle, roll the fabric in and raise it.
In face-up spreading the fabric face must point the way the job order says (usually up). If the roll is loaded the wrong way round, the whole lay comes out reversed; this is the most common mistake and the one noticed last.
Pull the fabric end by hand along the path shown on the machine diagram (cradle belt → dancer bar roller → edge sensor → spreading nose). The dancer bar is the moving roller that takes the tension out of the fabric during spreading; if the fabric runs over it instead of under it, tension control does not work.
The fixed (reference) selvedge is brought to the sensor’s reading line; the machine follows this edge throughout the lay and shifts the cradle sideways to align it. If the sensor is dirty or the edge curls, the machine reports “edge not found”.
Drive the machine to the table head, zero the lay start on the screen and fix the fabric end to the table (clamp or weight). Lay length is measured from this point.
The first ply is a test ply: spread slowly, check ply length and edge alignment with a tape, watch whether the fabric ripples on the table. If everything is right, raise the speed to the working value.
3. Settings: Speed, Tension, Edge, Length and Plies
The touch screen has five main parameters. Values depend on the fabric; once the right setting is found for a fabric it is saved to memory and recalled with one touch on the next job (the MN series stores 10 fabric programs).
| Parameter | What it does | How to set it |
|---|---|---|
| Spreading speed | Travel speed of the machine along the table; up to 100 m/min | The highest speed at which the fabric does not “fly” on the table; low on the first ply, then raised in steps. Keep it one step below the point where quality starts to drop. |
| Tension (dancer bar) | Lays the fabric without stretching; the encoder matches cradle belt speed to machine speed | “Zero tension” on elastane and knits; light on wovens. The dancer bar should swing around mid-position throughout the lay; stuck at the top means the fabric is being stretched, stuck at the bottom means too much fabric is being fed. |
| Edge alignment | Two photocells read the selvedge and shift the cradle; every ply ends on the same line | Choose the reference edge (right/left); sensitivity by fabric: wider tolerance on thin, curling edges. |
| Lay length | Marker length; the machine stops here and cuts the ply end | Marker length + end allowance (usually 2–4 cm). Verified with a tape on the first ply. |
| Ply count | Target plies; the counter increments each ply and the machine stops at the target | Limited by the cutter’s lay height capacity and fabric thickness; set by the cutting room supervisor. |
Typical starting settings by fabric type (they vary by plant and machine; always verify on the first ply):
| Fabric | Speed | Tension | Watch out for |
|---|---|---|---|
| Elastane knits (single jersey, interlock) | Low–medium | Zero | Relaxation is essential; wide sensor tolerance for curling edges. Why: tension-free spreading. |
| Wovens (poplin, gabardine) | Medium–high | Light | Little slippage; the end cut must be straight; suits high ply counts. |
| Denim and heavy fabrics | Medium | Light | Heavy rolls (up to 350 kg); a 4×4-drive machine with a tilting cradle (MJ1) and joystick control from the platform. |
| Slippery synthetics (lining, satin) | Low | Zero | Plies slide; underlay paper and low speed, fewer plies if needed. |
| Tubular knits | Medium | Zero | Not spread on an open-width machine; a tubular spreader (TS2) is required. |
4. Spreading Modes: Face-Up, Zigzag, Stepped, Tubular
The spreading mode defines how the fabric is folded onto the table and is chosen together with the marker plan. The wrong mode shows up in the sewing room as grain direction and face/back errors.
The machine spreads on the forward run, cuts the ply end and returns empty. Every ply faces the same direction and the same side. Standard for prints, pile, napped and direction-sensitive fabrics; the slowest but safest mode.
Spreads on both the outward and return run; the fabric is folded at the table end, not cut. Plies lie face to face; the fastest mode. Used for plain, non-directional wovens and linings; never for fabrics with a pattern direction.
Plies of different lengths are stacked: when size ratios differ, the sizes with higher quantities get full-length plies and the others shorter plies. The length and ply count of each step are entered separately in the program.
Tubular knit fabric is spread unopened, as a double layer with both edges closed. It needs a dedicated machine; on an open-width spreader tubular fabric runs off the edge and cannot be aligned.
We explain what a lay (marker) is and where it sits in the cutting process in what is a lay; the mode is always set by the person who prepares the marker plan, not changed by the operator.
5. What the Operator Watches During Spreading
Once “start” is pressed the automatic machine spreads on its own, but the operator does not stand idle at the table head. Five things are watched continuously:
When a roll runs out the machine stops, the operator loads the next roll and places the splice on a piece boundary in the marker. On a machine that works with PLT files (MN3) the splice points are shown on screen; with a projector the marker is projected onto the table so the splice never lands on a piece.
When a defect flag attached at the inspection machine arrives, the machine stops (if it has a flag sensor) or the operator sees it; the defective area is cut out or marked. A defect left inside a ply becomes a wasted piece after cutting.
Every 10 plies the reference edge and the ply end are checked by eye; if the lay edge starts to “stair-step”, the sensor is dirty or the edge is curling. If the end cut is not straight, the blade is dull.
The dancer bar should swing around mid-position; if the fabric ripples, creases or “balloons” on the table, the speed is too high or the tension is wrong. An elastane ply spread under tension shrinks 1–3 cm after cutting.
The ply count on the screen is compared with the job order; every roll change (roll number, length, splice position) is written on the spreading sheet. This record answers shade-lot and waste questions after cutting.
6. Daily, Weekly and Monthly Maintenance
Most spreader breakdowns come from three things: dirty photocells, lint and dust on the rails, and a dull end cutter blade. All three are prevented by maintenance. We separate the operator’s tasks from the service technician’s:
| Frequency | Task | Who |
|---|---|---|
| Every shift (5 min) | Wipe photocell and safety sensor lenses with a dry cloth; clear lint from rails and wheels; blow out the table and spreading nose with air; emergency stop test | Operator |
| Weekly (20 min) | End cutter blade sharpness check and replacement if needed; cleaning of cradle belt and dancer bar rollers; visual check along the rail for wear and loose bolts; edge alignment test lay | Operator / maintenance |
| Monthly | Lubrication of the points specified by the manufacturer; drive belt tension; cable and hose routing; screen and software backup; lay length calibration (spread 10 m and measure with a tape) | Maintenance |
| Yearly | Authorised service: motor and drive check, encoder and photocell calibration, bearing and belt replacement, safety circuit test | Authorised service |
7. 8 Safety Rules
A spreading machine travels the length of the table, carries a blade and a heavy load. The safety sensors (dual sensor system) stop the machine when they detect a person or object ahead; but a sensor does not replace a rule.
Not even to straighten the fabric. Stop first.
Blade changes only with the machine switched off and locked, wearing gloves.
A taped-over or bridged safety sensor is the most common cause of accidents.
A hoist is mandatory above 40 kg; even with two people the back and fingers are at risk.
No second person on the operator platform; never step off while it is moving.
The cradle belt and rollers catch; hair tied back, sleeves rolled up.
The machine runs to the very end of the table; table ends and the rail line stay clear during the lay.
Only trained operators whose names are in the maintenance log use the machine.
7 Common Operator Mistakes
- Spreading unrelaxed fabric. The lay looks fine on the table; the pieces shrink after cutting.
- Loading the roll the wrong way round. In one-way spreading the whole lay comes out reversed; it is noticed in the sewing room.
- Not threading the fabric through the dancer bar. Tension control is out of action, the ply is laid stretched, waste rises on elastane fabric.
- Spreading the first ply fast. A length or edge error is noticed 60 plies later; the first ply is always slow and measured.
- Mixing lots in one lay. Two shades appear in the same size; no roll is loaded without reading the label.
- Carrying on with a dirty photocell. Edge drift is taken for a “machine fault”; the fix is usually a cloth.
- Entering speed from memory instead of the stored program. Each fabric’s verified setting is saved and recalled; the setting does not change when the operator does.
Conclusion
Using an automatic spreader correctly is not about knowing the buttons; it is about knowing the fabric, never skipping preparation and reading the signals the machine gives (dancer bar position, edge warning, flag stop). Eight preparation checks, correct loading, parameters recalled from memory, a mode that matches the marker plan and five minutes of shift maintenance remove most waste, size deviation and breakdown stoppages. In a plant buying a new machine, operator training is part of commissioning; plan the training together with the installation and pin this guide next to the spreading table.
Let’s Set Up Your Spreader and Your Operator Together
Share your fabric types and daily spreading volume; we will plan the right machine, table compatibility and operator training together with the installation.
✉ Contact Us Spreading Machines Spreading Table GuideFrequently Asked Questions
How do you use a fabric spreading machine?
What speed should a spreading machine run at?
What does the dancer bar do?
What is the difference between zigzag and one-way spreading?
How often should a spreading machine be maintained?
What training does a spreading machine operator need?
Manufacturer of fabric spreading, cutting and inspection machines · Istanbul · 25+ years · exports to 80+ countries. November 2026.