Fabric shrinkage allowance is the percentage added to the pattern so that the garment still meets its target measurements after washing, and it is found by testing: benchmarks are marked 50 cm apart on the fabric, the specimen is washed and dried exactly as the garment’s care label says, and the benchmarks are measured again. Shrinkage % = (original − final) ÷ original × 100; length and width are calculated separately. Pattern dimension = target dimension ÷ (1 − shrinkage). Example: 70 cm body length, 5% shrinkage → 70 ÷ 0.95 = 73.7 cm. The allowance covers wash shrinkage only; shrinkage caused by spreading tension is handled by relaxation and tension-free spreading, not by the allowance.
This guide covers the test steps, the two formulas, a worked pattern example and lot-based shrinkage management in the cutting room.
- What Is Shrinkage Allowance, and Which Shrinkage Goes Into It?
- Shrinkage Glossary
- How to Run a Shrinkage Test: 6 Steps
- Formulas: Shrinkage Rate and Pattern Allowance
- Worked Example: Adding Allowance to a T-Shirt Pattern
- Typical Shrinkage Ranges by Fabric Type
- Managing Shrinkage in the Cutting Room: 5 Rules
- 6 Common Mistakes
- Frequently Asked Questions
1. What Is Shrinkage Allowance, and Which Shrinkage Goes Into It?
Fabric is stretched all the way through production: spinning, knitting or weaving, dyeing and finishing, and winding each pull the fibre a little further. That strain comes back at two separate moments. The first is relaxation shrinkage, which appears when the roll is opened and when a cut panel is released from the lay. It combines with spreading tension, it depends on the process rather than on the fabric, and with the right method it is brought below 0.5% (see tension-free spreading). The second is wash shrinkage, which appears the first time the garment is washed and dried: fibres swell, the knitted loop structure tightens, wool felts. This shrinkage is a property of the fabric; spreading cannot remove it, so it is compensated by enlarging the pattern by the amount of shrinkage. That enlargement is the shrinkage allowance.
49 × 47.5 cm
Get the allowance wrong and you lose in both directions. Too little allowance and the garment drops a size at the first wash; the result is returns and seconds. Too much allowance and every unnecessary 1% in the length direction means roughly 1% more fabric; over a year’s metreage that difference goes straight into the fabric waste line. The right allowance starts with the right test.
2. Shrinkage Glossary
3. How to Run a Shrinkage Test: 6 Steps
The test can be done in a factory without a laboratory; the two things that matter are benchmark discipline and using exactly the same wash programme as the garment’s care label.
Cut a specimen of at least 50 × 50 cm (the ISO 3759 minimum), not from the start of the roll but at least 1 metre in, and away from the selvedge. Overlock the edges of knitted fabric. Leave the specimen flat and free for 24 hours at room conditions so that relaxation shrinkage comes out before washing; otherwise the two shrinkages get mixed up.
Mark three pairs of benchmarks in each direction: length (warp or wale) and width (weft or course). The spacing is 35 cm in the ISO method and 25 cm in the AATCC method; what matters is that every pair uses the same spacing and is marked with indelible ink or coloured thread.
Wash temperature, programme and drying method (tumble, line or flat) must match the garment’s care label; ISO 6330 and AATCC 135 define these programmes. A garment tested at 40 °C but washed at 60 °C shrinks more than the calculated allowance. If the buyer specifies several washes (3 or 5 cycles), repeat accordingly.
Lay the dried specimen flat without stretching it, let it rest at room conditions, then measure the distance between each pair of benchmarks. Average the three measurements; a single measurement carries the fabric’s local irregularity into the result.
Separately for length and width: (original − final) ÷ original × 100. Record the result together with the lot and roll number, date, wash programme and drying method. A negative result means growth; it can occur in the width direction of knitted fabric.
Compare the value with the buyer’s tolerance; if it is exceeded, the fabric goes back for pre-shrinking or to the supplier. If it is within tolerance, the allowance goes into the pattern and the lot is assigned to a shrinkage group (see section 7).
4. Formulas: Shrinkage Rate and Pattern Allowance
Example: a 50 cm benchmark measures 47.5 cm after washing → (50 − 47.5) ÷ 50 × 100 = 5%. Length and width are calculated separately.
Example: target length 70 cm, shrinkage 5% → 70 ÷ 0.95 = 73.7 cm. The approximate formula (70 × 1.05 = 73.5) is fine for small shrinkage; as shrinkage grows, it leaves the allowance short.
Why divide? Shrinkage is a percentage of the original dimension, not of the pattern dimension: a 73.7 cm piece that shrinks 5% ends up at 73.7 × 0.95 = 70.0 cm. The “target × (1 + shrinkage)” shortcut gives 73.5 cm, which finishes at 69.8 cm after washing. The gap grows with the shrinkage rate:
| Shrinkage | Approximate: 100 × (1 + s) | Correct: 100 ÷ (1 − s) | Allowance left short (per 100 cm) |
|---|---|---|---|
| 2% | 102.0 cm | 102.0 cm | 0.04 cm — negligible |
| 5% | 105.0 cm | 105.3 cm | 0.26 cm |
| 8% | 108.0 cm | 108.7 cm | 0.70 cm — eats the tolerance |
| 12% | 112.0 cm | 113.6 cm | 1.64 cm — the size shifts |
5. Worked Example: Adding Allowance to a T-Shirt Pattern
Take a cotton single-jersey T-shirt. The buyer’s after-wash measurements: body length 70 cm, half chest 50 cm, sleeve length 20 cm. The lot’s shrinkage test came out at 5% in length and 2% in width. The pattern dimensions are found like this:
| Measurement | Direction | Target (after wash) | Shrinkage | Calculation | Pattern dimension |
|---|---|---|---|---|---|
| Body length | Length | 70.0 cm | 5% | 70 ÷ 0.95 | 73.7 cm |
| Half chest | Width | 50.0 cm | 2% | 50 ÷ 0.98 | 51.0 cm |
| Sleeve length | Length | 20.0 cm | 5% | 20 ÷ 0.95 | 21.1 cm |
| Allowance entered in CAD | Length / Width | All pieces are scaled proportionally; pieces are not lengthened one by one by hand | +5.3% / +2.0% | ||
In the pattern software the allowance is entered as a percentage in the length and width directions; the program scales every piece by the same ratio, so seam matching stays intact. The fabric effect is visible: the 5.3% allowance in length also makes the lay about 5% longer. That is why the allowance is never padded; whatever the test says is what goes in.
6. Typical Shrinkage Ranges by Fabric Type
The values below are typical ranges seen in the literature and on the shop floor; the decision is always based on the lot’s own test. Two lots of the same fabric can land at opposite ends of the range.
| Fabric | Typical wash shrinkage (length) | Note |
|---|---|---|
| Cotton woven, sanforized | 1–3% | Pre-shrinking lowers residual shrinkage; width is usually lower |
| Cotton woven, loomstate / unsanforized denim | 5–10% | For washed garments, test with the laundry’s actual recipe |
| Cotton knits (single jersey, interlock, rib) | 3–8% | Lower end for compacted fabric; growth may occur in width |
| Elastane knits | 5–10% | Rises with elastane content; relaxation before spreading is essential as well |
| Viscose / modal | 3–6% | Low dimensional stability when wet; the drying method changes the result |
| Polyester / nylon | 0–2% | Very low if heat-set; thermal shrinkage is added in the tumble dryer |
| Wool | 2–5% | Felting risk; the wash programme and temperature are decisive |
7. Managing Shrinkage in the Cutting Room: 5 Rules
The allowance is calculated in the pattern room, but it is kept or lost in the cutting room. Five rules:
Different lots of the same fabric shrink differently. Lots whose length shrinkage differs by more than 1% do not go into the same lay; they get a separate lay and a separate allowance. Take the specimen while the roll is opened on the inspection machine: quality inspection, length measurement and the shrinkage specimen are completed in one step.
Relaxation shrinkage does not go into the allowance; it is taken out before spreading. The roll rests open for 12–24 hours, or a fabric shaking machine removes the winding tension and the fabric goes to spreading without waiting. Giving an allowance to unrelaxed fabric mixes the two shrinkages: the allowance is inflated and the measurements still miss.
A calculated allowance is lost in tense spreading: 2% spreading tension takes away almost half of a 5% allowance, and the panel comes out smaller than the pattern the moment it is cut. An automatic spreader that matches feed speed to carriage speed (dancer bar and encoder) carries the allowance into the lay; see tension-free spreading for the details.
Compare a few panels from the first lay with the pattern one hour after cutting; outside ±0.5 cm there is a spreading problem. For production approval, sew one sample and wash it per the care label (AATCC 150 / ISO 5077 garment test): if the after-wash measurements match the spec sheet, the allowance is right.
Lot number, length and width shrinkage, wash programme and the allowance entered are kept in one table. The starting value for the same supplier’s next lot is ready; if the deviation grows, it goes on the supplier scorecard. This record is the cheapest insurance between the cutting room and the pattern room.
6 Common Mistakes
- One test for the whole season. The lot changes, the shrinkage changes; the second lot shifts a size.
- Calculating length only. Width shrinkage is different, and knits can even grow in width; a single allowance distorts both directions.
- Not matching the test programme to the care label. A garment tested at 40 °C and washed at 60 °C does not add up.
- Using the approximate formula at high shrinkage. At 8% shrinkage the allowance is 0.7 cm short on every metre.
- Adding spreading tension to the allowance. The allowance inflates and fabric consumption rises; tension belongs to relaxation and spreading, not to the allowance.
- Taking the specimen from the roll start or the selvedge. The outer layers of the roll are wound tighter and the selvedge shrinks differently; the result does not represent the lot.
Conclusion
Shrinkage allowance is set by testing, not by guesswork: mark, wash as the care label says, calculate length and width separately, divide the target dimension by (1 − shrinkage). Use the allowance for wash shrinkage only; solve spreading and relaxation shrinkage at the source with relaxation and tension-free spreading. A factory that tests each lot, assigns it to a shrinkage group and keeps the record eliminates both the size complaints after the first wash and the fabric consumption that grows with the habit of “leaving a generous allowance”.
Don’t Lose Your Allowance on the Spreading Table
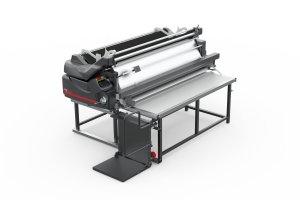
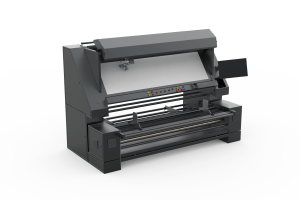
Tell us your fabric types and daily metreage; we will recommend shaking, tension-free spreading and inspection machines for your line and measure post-spreading shrinkage together on your own fabric.
✉ Request a Quote Spreading Machines Inspection MachinesFrequently Asked Questions
What is fabric shrinkage allowance?
How is fabric shrinkage allowance calculated?
How is a fabric shrinkage test done?
What is an acceptable fabric shrinkage rate?
What is the difference between shrinkage allowance and seam allowance?
If fabric is relaxed before spreading, is a shrinkage allowance still needed?
Manufacturer of fabric spreading, cutting and inspection machines · Istanbul · 25+ years · exports to 80+ countries. November 2026.