Setting up a cutting room comes down to six decisions: daily capacity (metres and lays), fabric mix, process flow (fabric store → inspection → relaxation → spreading → cutting → labelling → sewing), space and layout, machine selection (spreader, table, cutter, inspection, labelling) and utilities (power, compressed air, floor, lighting, data network). The order matters: capacity and flow first, machines last.
In this guide we walk through each decision with worked examples and checklists.
1. Capacity First: Lays and Metres per Day
A cutting room is planned with numbers, not machines. Five numbers are enough: daily fabric metres, daily number of lays, average lay length and ply count, fabric mix (knit / woven / denim / elastane share) and order structure (few styles in large quantities, or many styles in small quantities). Take the numbers for 3–5 years ahead, not for today’s orders; a table can be extended, a building cannot.
| Small workshop | Growing production | High capacity | |
|---|---|---|---|
| Lays per day | 1–3 | 4–10 | 10+ |
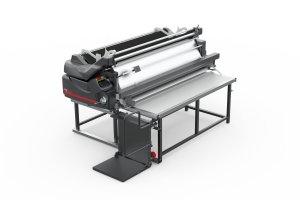
| Spreading | 1 table, automatic spreader optional | 1–2 automatic spreading lines | 2+ lines, denim spreader for heavy fabrics |
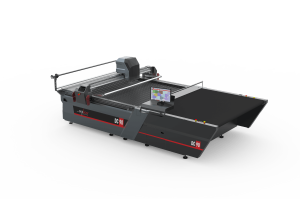
| Cutting | Straight knife or MC30 | MC50/MC70 or DC series | DC/DCC continuous cutting |
| Table | Modular | Modular + air-floating | Air-floating + conveyor |
| Inspection | Sample inspection of incoming fabric | 1 inspection machine by fabric type | Separate inspection lines for knit and woven |
| Labelling | Manual | Automatic labelling (MB2) | Automatic labelling |
2. Process Flow and Layout
Six rules:
- Keep the flow one-way. Fabric never goes back, the lay moves toward the cutter, cut parts exit close to the sewing room.
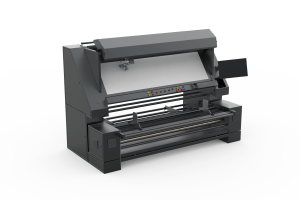
- Put inspection next to the store. Faulty rolls are screened before spreading; length is metered here and rolls are graded with the 4-point system.
- Reserve space for relaxation. Elastane and knitted fabrics must release their tension before spreading; racks or a shaking machine (SL1) speed this up. Skip it and pattern dimensions drift (tension-free spreading); the pattern allowance for wash shrinkage is calculated separately (shrinkage allowance).
- Spreading tables in parallel, the cutter at the table end. Lays are not carried by hand; choose an air-floating or conveyor spreading table to transfer them to the cutter.
- Labelling at the end of spreading, bundling at the cutter exit. Labels are printed onto the lay when spreading ends (MB2); cut parts are bundled at the cutter’s conveyor exit.
- Layout type follows the space: a straight line (I) is the most efficient, L in long narrow halls, U in square halls. Main aisle 2.5–3 m for pallet jacks; a roll-loading hoist (ML1/ML2) at the head of the spreading line.
3. Floor Space Calculation
| Area | Formula | Example (one line, mid-size) |
|---|---|---|
| Spreading table length | Longest lay + the spreader’s parking allowance (~2 m) | 12 m + 2 m = 14 m |
| Spreading line width | Table width (180–260 cm) + a 1.2 m walkway on each side | 2.2 + 2.4 = 4.6 m → ≈ 65 m² |
| Cutter area | Machine footprint + lay feed behind + bundling in front (~2 m each) | ≈ 40 m² |
| Inspection machine | Machine + roll in/out and metering area | ≈ 25 m² |
| Labelling and bundling | Labelling machine + bundling table | ≈ 20 m² |
| Store + relaxation | 3–5 days of consumption, racking | ≈ 60 m² |
| Aisles and walkways | ~20% of the total | ≈ 40 m² |
| Total | ≈ 250 m² |
The figures are an example; lay length, fabric width and the number of lines change the area. A second spreading line adds about 65 m²; one cutter can serve two lines.
4. Machine Selection: 5 Decisions
| Decision | Deciding question | Options | Guide |
|---|---|---|---|
| Spreading machine | Which fabric? | Woven/knit/elastane: MN1, MN3 · Denim and heavy: MJ1 · Home textiles: MH1 · Pile fabrics (nap direction): MNT1, MTT1 · Tubular: TS2 | How to choose a spreading machine |
| Spreading table | How does the lay reach the cutter? | Modular · Air-floating · Conveyor | How to choose a spreading table |
| Cutting | Lays per day, piece complexity? | Straight knife · MC30/50/70 (3–7 cm) · DC70/80/90 (7–9 cm) · DCC continuous cutting · FMC30 technical textiles | Straight knife or CNC cutting · How a CNC cutter works |
| Fabric inspection | Knit or woven, elastane content? | Knit: EK1, EH1, ES1 · Woven: DK2, DK3, DE1 (inspection + rewinding + metering) | 4-point system |
| Labelling and auxiliaries | Part tracking, roll loading, relaxation | MB2 labelling · ML1/ML2 hoist · SL1 shaking machine | — |
When the spreader, table and cutter come from one manufacturer, rail, height, transfer and service are solved in one place; mixed brands are the most common source of installation problems. If budget points you to second-hand equipment, factor in the cost of downtime: used or new.
5. Utilities Checklist
6. Setup Timeline: 5 Steps
Capacity, fabric mix, order structure, 3–5-year target.
Scaled drawing, one-way flow, walkways, room to expand.
Power, air, floor, lighting, network; finished before the machines arrive.
Rail alignment, table levelling, cutter calibration, trial lay.
Operator training; from month one track marker efficiency, waste and lays per day.
5 Common Mistakes
- Sizing capacity for today’s orders. Two years later there is no room for a second line.
- Buying the table and the cutter separately. Rail, height and transfer mismatches slow production.
- Leaving no relaxation space. Elastane fabric is spread under tension and pattern sizes drift in sewing.
- Skipping inspection. Faulty rolls go into the lay; waste and re-cutting rise.
- Leaving utilities to the end. The machines arrive, the panel and air line do not exist; commissioning slips by weeks.
Conclusion
A good cutting room is a design of flow, not of machines: set capacity with numbers, draw a one-way flow, size the space from lay length, choose machines to fit that plan and finish the utilities before the machines arrive. Run the five steps in order and the line is productive from day one.
Let’s Plan Your Cutting Room Together
Share your daily metres, fabric types and floor dimensions; we will propose spreading, table, cutting, inspection and labelling as one line, together with a layout plan.
✉ Request a Quote Spreading Tables Cutting Inspection LabellingFrequently Asked Questions
How many square metres does a cutting room need?
What is the right machine sequence in a cutting room?
Where should the fabric inspection machine go?
Which machines are enough for a small workshop?
How long does cutting room setup take?
What power and air utilities does a cutting room need?
Manufacturer of fabric spreading, cutting and inspection machines · Istanbul · 25+ years · exports to 80+ countries. October 2026.